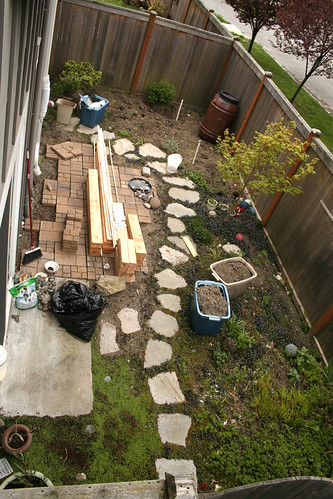
Progress shot Day 2 (Day 1 was just me ripping things out and digging out a stump)
This was taken April '09. Before I started this project the yard was a gloomy overgrown mess, constantly damp and shady. I wanted to have a vegetable garden and an area that I would enjoy spending time in. The paved section, with lumber sitting on it, was previously a pit of gravel. It was too unstable to set chairs on and wasn't very inviting. The pavers were about $200 and it took me 2 days to do it. Luckily the ground was level and fairly compacted, if not it would have been an extra days worth of work. I really LOVE the stone path that the previous owners put in. They made some good choices, but it just wasn't optimized.
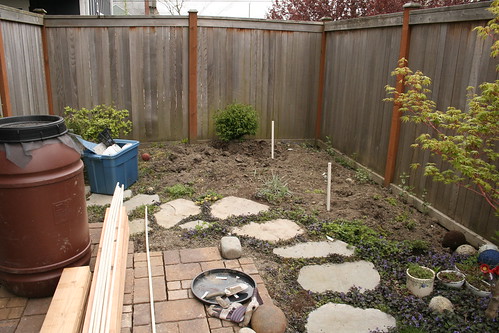
After the paving was done I started building the raised beds. This corner of the yard was the sunniest. I had to remove a mound of dirt and the stump from a sizable prunus tree. It was a biatch, someone had planted it with a wire cage around the root-ball?! Thank you who ever it was... thank you very much.
After I leveled the dirt I marked where the beds would sit. I decided to make 2 beds for that corner.
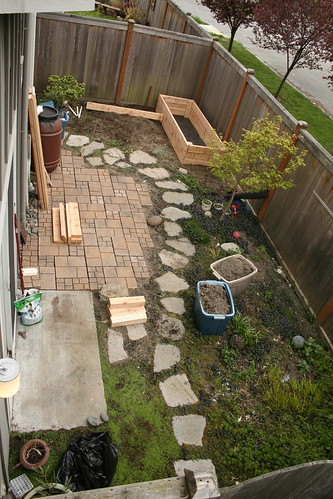
Progress shot Day 3
There are many ways to build a raised bed. I used this raised bed tutorial from Popular Mechanics and changed the design a bit. Since it's such a small area I didn't need the drip system. The basic idea is to build a 4 sided box without a bottom. The lumber cost was about $120 and I had another $40-$50 worth of misc. supplies like screws, weed blocker, PVC tubing and brackets for the trellis/tent system. I had most of the tools required so I didn't have to buy anything but the materials. There's also the cost of dirt...
If you're not the handyman type or don't have a chop saw etc... there are kits you can buy. They're usually pricier and do not include lumber. Here are some that I like:
Natural Yard Kit The cool thing with this one is that you can take it apart and you can put it together with just a hammer.
http://www.composters.com/raised-garden-beds.php
http://www.cleanairgardening.com/staking-kit-bed.html
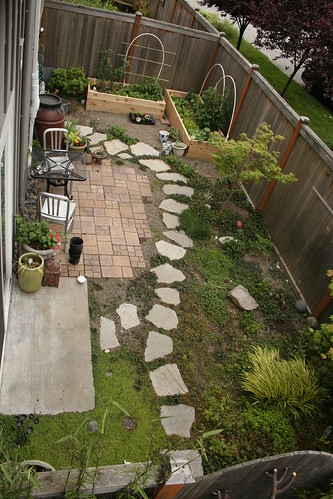
This is the yard finished. This picture was taken 2 months after I started the project. It took me 4-5 days over the period of 2 weeks to finish. It's become a much needed space for me. I love poking around in the dirt even when I'm crazy busy with work. Being in it is very peaceful and I can just let my mind go blank for awhile.


No comments:
Post a Comment