Saturday, June 26, 2010

Raised Bed Gardening First Year

This is a little catch-up from last year's gardening adventures...  I'm getting better about posting more often.
The beds in July
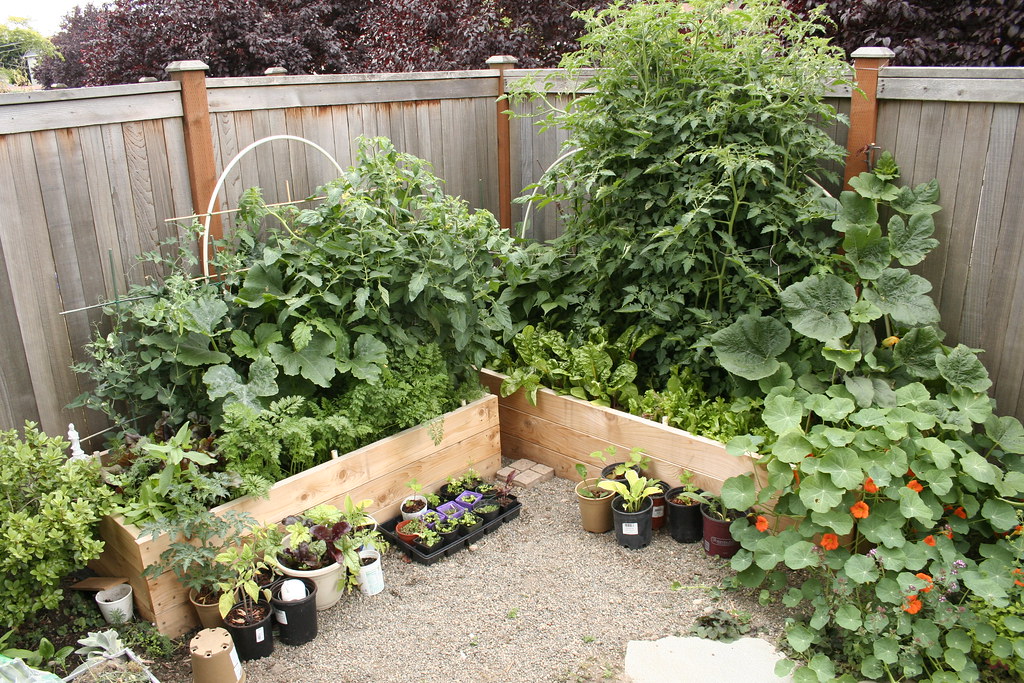
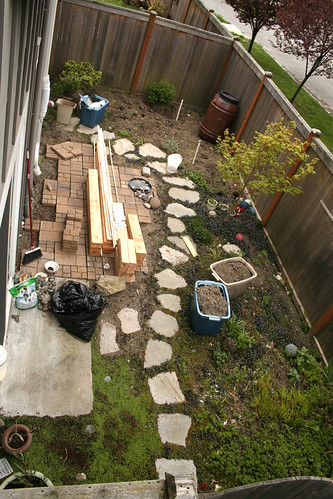
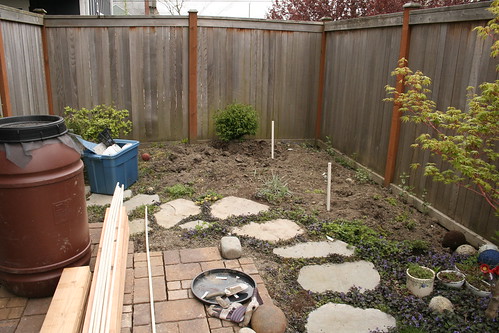
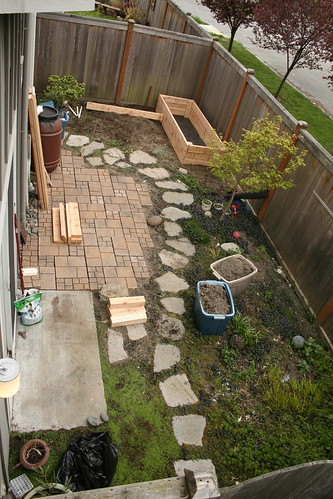
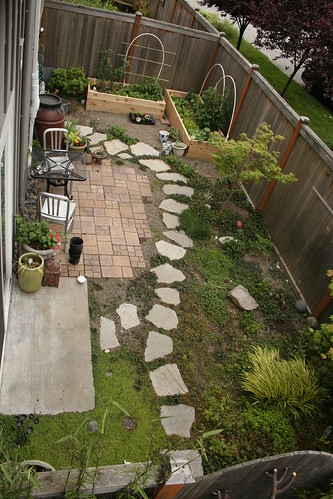
This was my raised bed garden in July 2009.   I built the beds in April, this was only 3 months of amazing growth!   Looking back there were a few factors that lead to this lush sight.   It was virgin soil with plenty of nutrients and I added bone meal and veggie fertilizer in the mix.  It was also a really hot and sunny summer. We hit 3-digit days in Seattle, that's unheard of!!!

I was a total NOOB to growing vegetables.  My strategy was to cram plants in where ever there was space, resulting in some plants crowding and overshadowing others.  I planted zucchinis in the middle of one bed and it pretty much took over the whole space.  I learned my lesson this year and planted it in an outer corner.  When it grows it can spill out of the box leaving plenty of room for other plants.  I'm also growing more leafy greens instead of root veggies.  I eat a lot more greens and they don't take as long to mature.  My carrots and beets didn't do too well.  Maybe I need more sun?

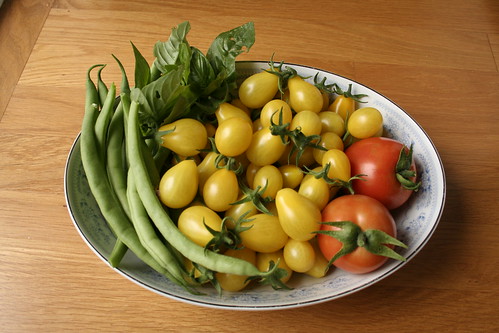
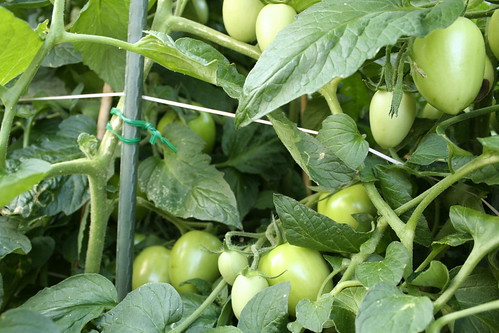
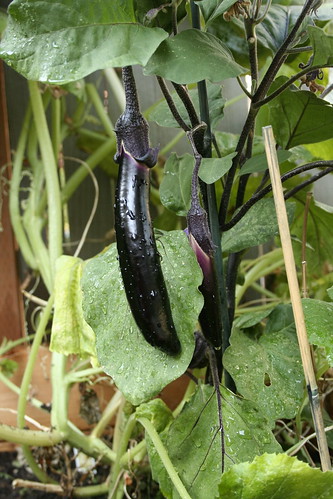
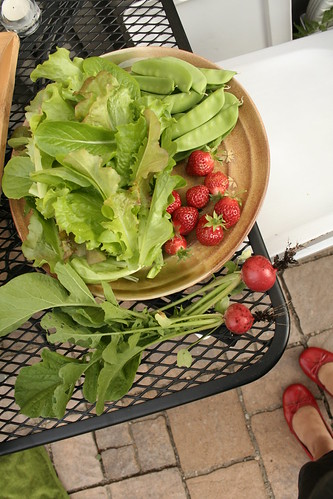
A few shots of what I pulled from the garden last year.
I haz harvest!

Latest Harvest

Guy Approves

Romas

Japanese Eggplants

What came from the garden

Tonight's dinner
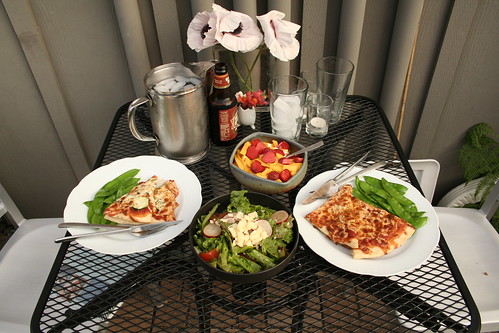
It was also really nice getting to sit in the garden and eat.

Friday, June 25, 2010

The Yard: After

I'm so sorry this is a year late!  I started this huge "Raised Bed/Patio Yard of DOOM" project last year and totally neglected to post the finished result! So here it is a year and 2 months late:
Day 2
Progress shot Day 2 (Day 1 was just me ripping things out and digging out a stump)
This was taken April '09.  Before I started this project the yard was a gloomy overgrown mess, constantly damp and shady.  I wanted to have a vegetable garden and an area that I would enjoy spending time in. The paved section, with lumber sitting on it, was previously a pit of gravel.  It was too unstable to set chairs on and wasn't very inviting.  The pavers were about $200 and it took me 2 days to do it.  Luckily the ground was level and fairly compacted, if not it would have been an extra days worth of work.  I really LOVE the stone path that the previous owners put in.  They made some good choices, but it just wasn't optimized.

Our little yard
After the paving was done I started building the raised beds.  This corner of the yard was the sunniest.  I had to remove a mound of dirt and the stump from a sizable prunus tree.  It was a biatch, someone had planted it with a wire cage around the root-ball?!  Thank you who ever it was... thank you very much.
After I leveled the dirt I marked where the beds would sit.  I decided to make 2 beds for that corner.

Day 3
Progress shot Day 3
There are many ways to build a raised bed.  I used this raised bed tutorial from Popular Mechanics and changed the design a bit.  Since it's such a small area I didn't need the drip system.  The basic idea is to build a 4 sided box without a bottom.  The lumber cost was about $120 and I had another $40-$50 worth of misc. supplies like screws, weed blocker, PVC tubing and brackets for the trellis/tent system.  I had most of the tools required so I didn't have to buy anything but the materials.  There's also the cost of dirt...
If you're not the handyman type or don't have a chop saw etc... there are kits you can buy.  They're usually pricier and do not include lumber.  Here are some that I like:
Natural Yard Kit The cool thing with this one is that you can take it apart and you can put it together with just a hammer.
http://www.composters.com/raised-garden-beds.php
http://www.cleanairgardening.com/staking-kit-bed.html

Garden in June
This is the yard finished.  This picture was taken 2 months after I started the project.  It took me 4-5 days over the period of 2 weeks to finish.  It's become a much needed space for me.  I love poking around in the dirt even when I'm crazy busy with work.  Being in it is very peaceful and I can just let my mind go blank for awhile.

Wednesday, June 23, 2010

Behind the Nike Project

Scattered Crayons
First off I just wanted to say WOW!!!  Holy cow, I didn't expect such an amazing response to this project!  Thank you EVERYONE in Internetland and beyond!  Here is a quick peek at some in progress images.

Wonder Woman Cheering
Right after the Nike Project was confirmed I did a little dance and got right to work.  I started by making a few sketches and peeling crayon labels.  The peeling process has become somewhat meditative.  If I ever end up in an asylum I'll be the girl in the corner rocking back and forth peeling crayon labels.  Wonder Woman was also there to cheer me on. 

Shoe Detail
I made a few partially carved samples including this one.  I wanted to focus on the shoes (naturally), grass texture and the figure's movement.  I've always carved standing figures, this was my first attempt at carving more dynamic movements.  There's only so much you can do within the physical borders of a crayon, but I wanted to see how much I can allude to.

Making copies
No, they're not spooning...
This was also my first time making multiples of one figure.  Next to the major time crunch making multiples was my biggest challenge.  I made a "master" carving and used it as reference for all of the other copies.  I would draw guidelines from one figure to the next and quickly rough out an approximation.  After all of the major parts were in place it was only a matter of refining the details.  The details take time, but it's not as nerve-racking.

Let the Chips Fall Where They May
A friend once compared my carved crayon surface to the facets of a crystal.
Here's what W+K's got to say.  There goes my secret of outsourcing to gerbils!  :P

Tuesday, June 8, 2010

World Cup 2010!

Ronaldo World Cup 2010
I was commissioned by Wieden + Kennedy to carve 66 crayons for Nike's promotion of World Cup 2010!  Eleven special recipients received these boxes... I have no idea who got them, but I'm so jealous!  W+K is amazing to work with and the project was a welcomed challenge!  I had 18 days to make around 70 crayons, there was a week I slept 3 hours a night.  Enthusiasm and great communication from the team at W+K really helped my progress.  BIG THANKS TO:
Kelly Wright
Matt Blum (& Wendy)
Krystle Mortimore
Brad Simon
and the WHOLE TEAM!
Also a big thanks to John Jay for having my work in your office!

Clamshell Open

Clamshell Open
The clam-shell presentation box.


Clamshell Closeup
The contents: the wooden carrier also serves as the crayon's base.

Base Standing
The crayons in their base.

All Pieces
All of the pieces:
The design team at Wieden Kennedy made the box, base and contents.  I made the crayons.  They also chose the colors, it was a metallic/stone theme.  I've never worked with metallics or white before.  I'm a BIG fan of the silver and white crayons now. 
Photos courtesy of Wieden + Kennedy

Fronts
The 6 figures that are in each box.  In the final version Robinho (far left in Silver) sticks his tongue out slightly and Rooney (Grey) has his arm folded instead of raised above his head.  I wish I could have captured Rooney's signature pose, but it was impossible considering the form of a crayon.

Cannavaro World Cup 2010
Fabio Cannavaro in Antique Brass from Crayola.  This color was introduced in 1998 in the 120 box set.

Drogba World Cup 2010
Didier Drogba in Copper from Crayola. This color was introduced in 1957 and is Charles Schulz's favorite color from Crayola.

Ribery World Cup 2010
Franck Ribery in Gold from Crayola.  The color was introduced in 1949 in the 48 box set.

Robinho World Cup 2010
Robinho in Silver from Crayola.  This color was introduced with Gold in 1949 in the 48 box set.

Ronaldo World Cup 2010
Cristiano Ronaldo in White from Crayola. Introduced in the Studio & School 12 box in 1903

Rooney World Cup 2010
Wanye Rooney in Timberwolf from Crayola.  Introduced in 1993 in the Big Box of 96.

Here is Nike's Write the Future World Cup spot.  I love the part where they start printing "Wayne" name bracelets!

http://www.youtube.com/user/nikefootball

Wednesday, June 2, 2010

Mrs. McDougall The Vet

The Vet
A special commission from Mr. McDougall to Mrs. McDougall.  She just graduated from vet school and they're expecting a new addition to the clan.  Lots of exciting things happening in their lives so he wanted something special to commemorate the moment.  Thanks for choosing me to do this, I'm honored!

Mrs. McDougall

Eagle on Canoe
He requested a carving of an eagle.  They also love canoeing, so I combined the two.  I tried carving the whole canoe but it wouldn't fit given the scale of the eagle.  I ended up with a half canoe sticking out of the water.  I think it turned out very well!